
Best camera modes for photographing birds.
What are the best shooting modes for bird photography with the kind of camera you have? There about four different shooting modes you can use for bird photography. The first one I use 90% of the time is called aperture priority mode. The second one I use some of the time is shutter priority mode. The third one is manual mode, which I use the least. The fourth one on some cameras is a little icon that’s for action sports; it has a running man on it.
One of the things I want to share before you go out to photograph birds is to preset your shooting modes before for the day. I learned the hard way when I went out to photograph an Osprey, and I had been taking landscape photos the day before. I did not do my preset routine, as soon as I got out of the car boom, an Osprey flew right in front of me and grabbed a fish right out of the water! I looked at my photo, and it was blurry because I had the camera set up to photograph landscapes the day before. So don’t forget to set your camera mode settings before going out. The most important thing to remember is to set your F-Stop at a low number like 5.6.

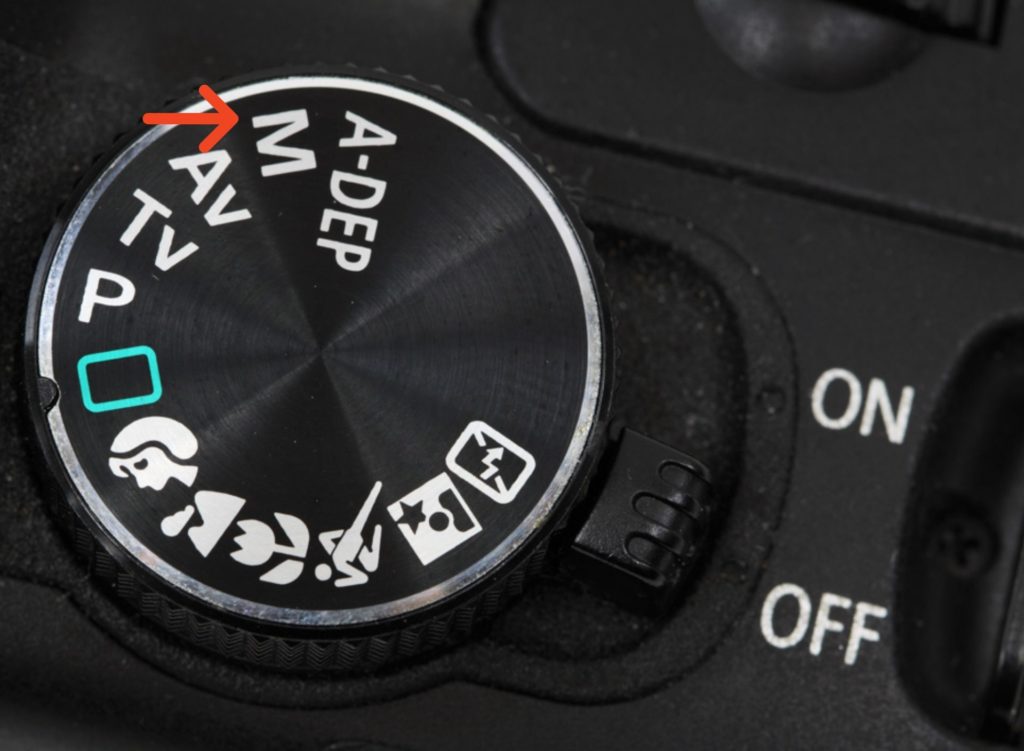
Aperture Priority Mode.
Aperture priority mode is where the user selects the f-number. In contrast, the camera picks the appropriate shutter speed to match it that will result in good exposure based on the lighting conditions as measured by your camera’s meter. I found over the years that using aperture priority mode has given me the best results when photographing birds. Obviously, birds are not going to be sitting still there going to be continually moving around. So as they move around, that means the lighting conditions are going to be changing. They could fly to a tree in the shade they can move in an area that’s a lot darker than the place you’re shooting before. That’s the main reason I like aperture priority mode. As those situations change, the camera is going to change the shutter speed due to the different lighting conditions. I have always gotten the best photos when using this mode.

Shutter Priority Mode.
Shutter priority mode is where you choose a specific shutter speed while the camera adjusts the aperture to ensure correct exposure. I use this mode on occasion when I’m looking to take an artistic looking image of birds. Specifically, birds in flight when I want to get a semi blurred image of bird or birds in flight this setting is the one I would choose. Shooting in priority mode is a good choice when shooting in low light. When there’s too much light, your camera will increase the lens aperture to a larger number. Changing the f stop to a larger number will decrease the amount of light that passes through your lens. When there’s not enough light, the camera will reduce the aperture to its lowest number. That means more light passes through your lens. One other thing there is no control over subject isolation because you’re letting the camera control the depth of field. So if your goal is to have a soft background, I would use aperture priority.
Manual Mode.
The manual mode is self-explanatory. I don’t use manual mode much when photographing birds; as you know, you have to set all the exposure parameters manually. You will choose the f stop shutter speed etc. I find it to be cumbersome, that’s why I want aperture priority mode more times than not when it comes to photographing birds. I like to make it as simple as possible. There are times when you want to use manual mode for bird photography. One reason is when you have extreme lighting situations. For example, if you’re photographing a bird in a very bright area, your camera might incorrectly choose the exposure and either overexpose or underexpose your image. You can override the settings to get the proper exposure.
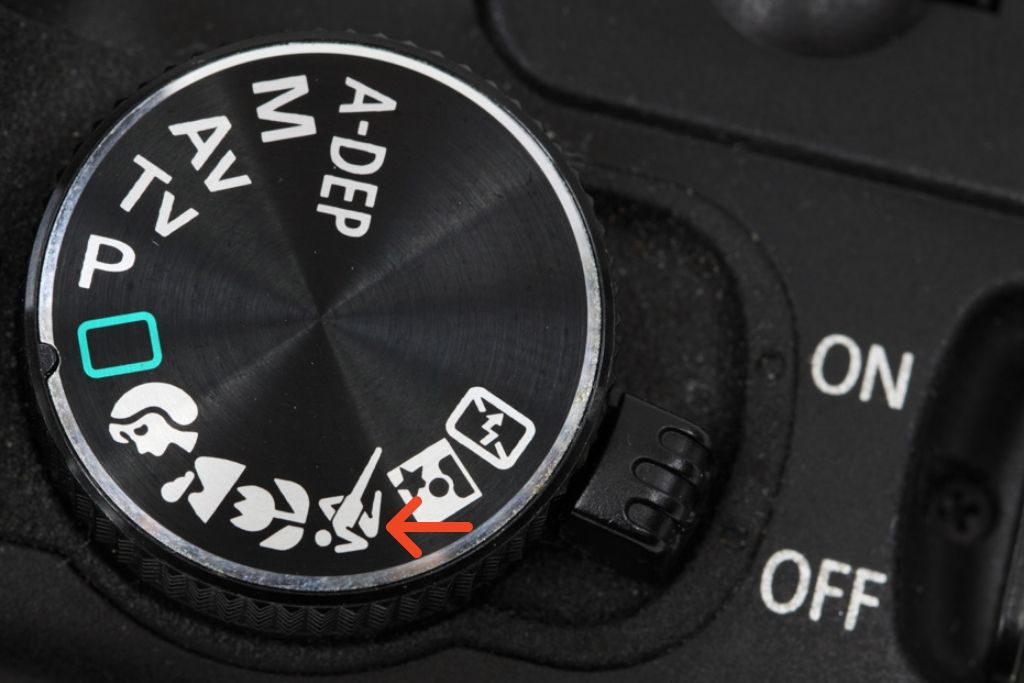
Sports Action Mode.
If your camera has the sports action mode, which is the little icon of the running man on it, this is an automatic mode. You can use it for bird photography, but as I said, I liked using aperture priority mode the most. You have the most control over your camera when it pertains to photographing birds. One other thing I would recommend no matter what mode you choose except for the sports action mode is to use an auto iso. That option for me has helped me the most when photographing birds.
Here are some simple rules and guidelines to follow. I suggest using spot metering when you’re going to be photographing birds that are backlit. When your birds are the central part of your scene or its a very tight shot, you want to make sure to have a great balance between both use matrix mode. If you’re photographing in bright sunlight that is a little harsh and variable, you want to use evaluative metering for Canon users and Center-Weighted for Nikon users.
Metering modes are just as important as shooting modes. There are three positions: Spot, Matrix metering for Canon users, and Center-Weighted for Nikon users. So what’s the best metering mode you should use? First, let me explain what the differences are. Spot metering means the camera only uses a tiny part of the sensor to get a proper exposure. Matrix metering mode means the camera uses most of the sensor to get the appropriate exposure. Center-Weighted metering means the camera uses the middle part of the sensor to get the proper exposure.
Conclusion: whatever choice you make, find the one that suits best for you whether you use aperture priority mode, shutter priority mode, or manual mode or the sports action mode. It’s up to you to find what works best. So go out and try these different options and see what you think works best for you and take some great bird pictures.


Recent Posts
Twenty Years in the Wild: The Patience Behind Capturing the Swallow Migration.
The Colorado River near Castle Dome glowed with first light, the water turning from ink to molten copper as the desert woke. Out of the riparian thickets rose a living wave of thousands of Tree...
Hey there, fellow shadow chaser. If you’re reading this, you’ve probably stood in golden hour light, watched a bird, a car, or a lone tree melt into a perfect black shape against a blazing sky,...