

Capturing dramatic landscapes requires a skillful combination of photography settings to bring out the full potential of the scenery. Several vital elements come into play, each contributing to creating stunning and impactful landscape photographs.
Aperture:
The choice of aperture plays a significant role in landscape photography, allowing you to control the depth of field and influence how much of the scene appears sharp and in focus. Opting for a relatively small aperture, represented by a higher f-stop number like f/11 or f/16, is commonly used to maximize the depth of field. Doing so ensures that not only the immediate foreground but also the distant background elements are rendered sharply.
When you set a small aperture, the lens’s opening narrows, allowing only a limited amount of light. This results in an increased depth of field, meaning a more significant portion of the scene is in focus from front to back. Consequently, the viewer’s eye can explore the entire expanse of the landscape, from the closest elements to the farthest horizons, and maintain clarity.
With the foreground and background elements in sharp focus, you create a compelling visual journey for the viewer, drawing them deeper into the scene. This sense of depth enhances the overall composition, making the photograph feel more immersive and inviting. As a result, the audience can appreciate the intricate details and textures of the landscape, from the rugged rocks and foliage in the foreground to the majestic mountains and vast skies in the distance.
Furthermore, a small aperture is particularly advantageous when dealing with scenes with significant depth variations or when there are prominent elements in the foreground and background that you wish to include in the composition. It’s an excellent technique for capturing sweeping vistas, expansive landscapes, and scenes with a strong sense of scale.
However, it’s essential to balance the aperture setting and other factors, such as shutter speed and ISO, to ensure proper exposure. As the smaller aperture restricts the amount of light entering the camera, it might lead to longer exposure times, especially in low-light conditions. Therefore, a tripod is highly recommended to maintain stability and prevent camera shaking during longer exposures.
Selecting a relatively small aperture, like f/11 or f/16, to achieve a wide depth of field is a powerful tool for landscape photographers. It emphasizes the beauty of the scenery, making it feel more vivid and engaging by ensuring that foreground and background elements are in sharp focus. This technique enhances the overall composition, allowing viewers to immerse themselves in the breathtaking beauty of the captured landscape.

Shutter Speed:
In landscape photography, using a tripod is a fundamental practice that significantly improves the quality and impact of the final images. Its primary purpose is stability, especially when working with longer exposure times.
Longer exposures are commonly employed in landscape photography to achieve various creative effects, such as capturing the smooth flow of water in a river or waterfall, blurring the movement of clouds to create a dreamy atmosphere, or even capturing star trails during nighttime shots.
By mounting the camera on a tripod, you eliminate the risk of camera shake caused by handheld shooting, ensuring the image remains sharp and clear. Even the slightest movement when shooting with longer exposure times can lead to unwanted blurriness, diminishing the overall quality of the photograph. The tripod allows for a steady platform, providing a stable foundation for your camera and lens, and helps maintain the precise framing and composition you desire.
Moreover, using a tripod allows you to slow down the shutter speed, which is instrumental in capturing the sense of motion in elements like flowing water or drifting clouds. When you use a slower shutter speed, the camera’s sensor remains exposed to light for a more extended period, causing moving elements to blur while stationary objects stay sharp. This technique imparts a sense of dynamism and flow to the image, making it more visually engaging and artistically appealing.
On occasions where using a tripod is impractical or not feasible, such as when you need to move quickly or when tripods are prohibited in specific locations, handheld shooting becomes necessary. In such situations, it’s essential to adhere to the rule of thumb commonly referred to as the “reciprocal rule.” This rule suggests that the minimum shutter speed for handheld shots should be equal to or faster than the reciprocal of the focal length of the lens you are using.
For example, if you’re shooting with a 50mm lens, maintain a shutter speed of at least 1/50s to reduce the risk of camera shaking.
However, it’s crucial to remember that the reciprocal rule is a general guideline and may vary depending on factors such as the photographer’s steadiness, the specific lens being used, and the presence of image stabilization technology in the camera or lens.
In challenging lighting conditions or when shooting with longer focal lengths, it may be necessary to use faster shutter speeds or other stabilization techniques like bracing yourself against a stable surface to ensure sharp results.
Using a tripod in landscape photography provides stability and enables longer exposure times, allowing you to achieve creative effects such as capturing the motion of water and clouds. It ensures the image remains sharp and well-composed, resulting in higher-quality photographs. When handheld shooting is necessary, adhering to the reciprocal rule helps reduce the risk of camera shake, ensuring a higher likelihood of sharp images even without a tripod.

ISO:
The ISO setting in photography is a critical parameter that directly influences image quality, noise levels, and overall exposure. In well-lit conditions, such as during bright daylight or under studio lighting, it is advisable to use the lowest possible ISO setting, typically ISO 100 or 200, to achieve optimal image quality. At these lower ISO values, the camera’s sensor is less sensitive to light, resulting in less electronic amplification of the signal and, therefore, reduced noise in the final image. This leads to cleaner, sharper, and more detailed photographs with a broader dynamic range.
By utilizing a low ISO setting in well-lit scenarios, photographers can produce images that accurately represent the scene’s colors and textures while minimizing the risk of introducing unwanted visual artifacts caused by noise. This approach is especially advantageous when shooting landscapes, portraits, or still life, where image clarity and fidelity are paramount.
However, there are situations when the available light is limited, such as during sunset, twilight, or in dimly lit indoor environments. In these cases, achieving a correct exposure with a low ISO setting may require an impractically slow shutter speed, leading to motion blur or camera shake. To address this challenge, photographers can increase the ISO setting, making the sensor more light-sensitive and allowing faster shutter speeds.
By raising the ISO value, photographers can capture images with proper exposure even in challenging lighting conditions, preventing the blurring of moving subjects and reducing the risk of camera shaking when shooting handheld. However, it’s crucial to be mindful of the trade-off involved in this decision. As the ISO increases, so does the potential for noise in the image. Higher ISO settings amplify the sensor’s signal, which can result in the appearance of grainy, speckled, or discolored pixels, reducing overall image quality.
Modern cameras often offer impressive performance at higher ISO values, thanks to advances in sensor technology and noise reduction algorithms. Nevertheless, a practical limit exists to how high the ISO can be pushed before noise becomes too intrusive and degrades the image. As a result, finding the right balance between exposure and acceptable noise levels is a critical skill in low-light photography.
To maintain excellent image quality and minimize noise, photographers should use the lowest possible ISO setting in well-lit conditions, such as ISO 100 or 200. However, increasing the ISO is a valid approach in low-light situations or when faster shutter speeds are necessary, provided the photographer remains aware of the noise trade-off. By understanding the interplay between ISO, exposure, and noise, photographers can make informed decisions to achieve the best possible results in various lighting conditions.
Composition:
The art of landscape photography extends beyond merely capturing beautiful scenery; it involves skillfully composing the elements within the frame to create visually compelling and emotionally impactful images. One of the critical aspects to master in this genre is composition – the arrangement and placement of various elements in the photograph to guide the viewer’s gaze and convey a specific message or feeling.
First, the rule of thirds is a fundamental composition technique that divides the frame into a grid of nine equal sections by two vertical and two horizontal lines.
Placing the main points of interest or subjects along these grid lines or at their intersections can produce a more balanced and aesthetically pleasing composition. This approach helps avoid centering the subject, sometimes leading to a static and less engaging image. Instead, it introduces a sense of dynamism and harmony, drawing the viewer’s eye along natural paths within the frame.
Leading lines are another powerful tool in landscape photography composition. These are elements such as roads, rivers, fences, or even patterns in the landscape that guide the viewer’s gaze toward the main subject or vanishing point in the distance. Photographers create a visual journey for the viewer by incorporating leading lines, allowing them to explore the scene step by step, ultimately leading their attention to the intended focal point.
Framing techniques add depth and context to landscape shots, enhancing the viewer’s connection with the photograph. Using natural elements like trees, arches, or rock formations as frames can create a sense of peering into the scene from a unique perspective. Frames draw attention to the main subject by containing it within the photograph and helping to establish a visual boundary between the subject and the surroundings.
Furthermore, considering foreground interest is essential in landscape photography composition. Including exciting elements in the foreground can add depth and dimension to the image, making the viewer feel like they are in the scene. It can be anything from flowers, rocks, or other objects that complement the overall composition and provide a starting point for the viewer’s exploration of the image.
In landscape photography, the interaction between elements is critical for telling a story and conveying emotions. Balancing the elements within the frame, paying attention to the visual flow, and eliminating distractions are all aspects photographers must consider when composing their shots.
Finally, breaking traditional composition rules can lead to creative and impactful images. Experimenting with unconventional angles, perspectives, and compositions can create unique and thought-provoking photographs that challenge the viewer’s perception and make a lasting impression.
Mastering landscape photography composition involves techniques like the rule of thirds, leading lines, and framing to guide the viewer’s eye and emphasize the main subject. Creating visually engaging photographs goes beyond capturing beautiful scenery; it requires a deliberate arrangement of elements within the frame to tell a compelling story and evoke emotions in the viewer. A well-composed landscape photograph can transport the viewer to the location and immerse them in the beauty and grandeur of the natural world.

Filters:
When photographing landscapes, using filters can significantly enhance the quality of your images and provide greater control over exposure and lighting conditions. Two essential filters that dramatically improve landscape photography are graduated neutral density (ND) and polarizing filters.
Graduated ND filters are designed to address the challenge of high-contrast scenes where the sky is significantly brighter than the foreground. These filters are dark at the top and gradually clear at the bottom, creating a smooth transition between the darkened and transparent portions. By placing the darkened portion over the bright sky, you can effectively reduce its brightness while maintaining proper exposure in the foreground.
A graduated ND filter lets you capture the full range of tones in the scene without overexposing the sky or underexposing the foreground. This results in a well-balanced exposure with visible details in the image’s bright and darker areas. With the filter, you might avoid a situation where you have to choose between blown-out highlights in the sky or underexposed shadows in the foreground. The graduated ND filter eliminates this problem, ensuring every area retains essential details.
On the other hand, a polarizing filter is incredibly versatile and serves multiple purposes in landscape photography. Its primary function is to reduce glare and reflections from non-metallic surfaces such as water, glass, and leaves. By rotating the filter, you can control the polarization, making the glow less pronounced and enhancing the natural colors and contrast in the scene.
In landscapes, polarizing filters are handy for darkening the blue skies, making the clouds pop, and bringing out more vivid colors in vegetation and bodies of water. They can also help reveal hidden details below the surface of water, such as rocks or aquatic plants, by reducing the reflections.
These filters provide landscape photographers with essential tools to balance exposure, control reflections, and enhance colors. They offer greater creative control during the capture process, reducing the need for extensive post-processing adjustments. By managing the exposure and lighting conditions in the camera, you can achieve more natural and visually striking landscape photographs.
However, it’s essential to use high-quality filters to maintain the overall image quality.
Cheaper filters might introduce color casts or reduce sharpness. Investing in reliable filters ensures that the optical performance of your lenses remains uncompromised, resulting in superior image clarity and fidelity.
Graduated neutral density (ND) filters are ideal for managing exposure in high-contrast scenes, allowing you to preserve details in the bright sky and darker foreground. Polarizing filters reduce glare and enhance colors, making skies and water bodies more vibrant and visually appealing. Using these filters judiciously, landscape photographers can elevate the impact of their images and create captivating and beautifully balanced compositions that showcase the full splendor of nature.

White Balance:
White balance is a crucial aspect of photography that directly affects how colors are rendered in an image. It determines the color temperature of the light recorded by the camera, ensuring that the colors appear natural and true to the scene as perceived by the human eye. While many modern cameras offer an auto white balance (AWB) setting, which can be effective in certain situations, manually adjusting the white balance can elevate the overall quality and impact of the photograph.
The camera’s auto white balance setting attempts to analyze the scene’s lighting conditions and adjust the color temperature accordingly. While it can be helpful in scenarios where the lighting is consistent and neutral, such as in daylight or under controlled studio lighting, it may only sometimes produce the desired results in challenging or mixed lighting situations.
By manually adjusting the white balance, photographers gain greater control over the image’s final look. One typical example is using a warmer tone, represented by a higher Kelvin value, during the golden hour, which is the time shortly after sunrise and before sunset when the sun’s light appears softer and golden. Manually setting the white balance to a higher Kelvin value, typically between 5000K and 7000K, can intensify the warm hues of the golden light, adding a touch of magic and enhancing the overall sense of drama and romance in the photograph.
Conversely, in scenes with excellent light, such as during the blue hour or in shadowy areas, a cooler white balance (lower Kelvin value) can accentuate the cool tones and evoke a serene and tranquil atmosphere.
Moreover, deliberately adjusting the white balance can be an artistic choice to set the mood or convey a specific emotion. For instance, using a cooler white balance in a photograph of a snowy landscape might emphasize the chilly and serene ambiance. At the same time, a warmer tone in a portrait of a subject in front of a fireplace might evoke a cozy and inviting feeling.
In post-processing, manually fine-tuning the white balance allows photographers to correct any color casts that might have been present in the original image due to the lighting conditions or the camera’s sensor characteristics. This flexibility ensures that the final image accurately represents the intended colors, regardless of the lighting challenges during the shoot.
While auto white balance can be convenient and sufficient in some situations, manually adjusting the white balance in photography grants greater creative control and the ability to enhance the image’s mood, atmosphere, and emotional impact. By understanding the effects of color temperature and using it intentionally, photographers can produce visually stunning and emotionally resonant photographs that capture the true essence of the scene and leave a lasting impression on the viewer.

RAW Format:
Shooting in RAW format is a valuable practice embraced by many professional photographers due to the significant advantages it offers in post-processing. Unlike shooting in JPEG, which applies in-camera processing and compression to produce a final image, RAW captures all the data directly from the camera’s sensor, preserving every detail and nuance in the scene.
The abundance of data in RAW files gives photographers unparalleled flexibility and control regarding post-processing. Because RAW files retain more information, they allow for non-destructive editing, meaning adjustments made during post-processing do not degrade the image quality. This is in contrast to JPEG, where each edit can result in a loss of image data, leading to a decrease in image quality with every subsequent modification.
Regarding exposure adjustments, RAW files provide a broader latitude for correcting overexposed or underexposed images. In post-processing, photographers can recover details in the highlights and shadows, allowing them to fine-tune the exposure and achieve a well-balanced image. Recovering lost information in bright and dark areas is particularly beneficial in high-contrast scenes or challenging lighting conditions.
Similarly, RAW files offer more control over contrast adjustments. Photographers can selectively adjust contrast levels in specific image areas without affecting others, allowing for targeted enhancements. This precision in contrast adjustment enables photographers to create images with a wide range of tones, making them visually dynamic and compelling.
RAW files also grant photographers enhanced control over color adjustments. The broader color gamut and greater bit-depth in RAW images facilitate more accurate and subtle color manipulations. Photographers can adjust white balance, saturation, and hue with finer precision, ensuring the colors in the final image reflect the photographer’s artistic vision.
Furthermore, RAW files provide the flexibility to work with different color spaces during post-processing, such as Adobe RGB or ProPhoto RGB, which have larger color gamuts than the standard sRGB. This flexibility is crucial for printing, allowing photographers to retain more color information and produce high-quality prints with accurate colors.
Another essential benefit of shooting in RAW is the ability to revisit older images and apply new post-processing techniques without compromising image quality. As technology and software improve, photographers can reprocess their RAW files with the latest tools and techniques, breathing new life into their photographs and adapting them to changing artistic preferences.
Shooting in RAW format offers photographers unparalleled flexibility and control in post-processing. The abundance of data in RAW files allows for non-destructive editing, making it possible to adjust exposure, contrast, and colors without sacrificing image quality. By taking advantage of RAW’s capabilities, photographers can fine-tune their images to perfection, preserve important details in high-contrast scenes, and maintain the integrity of their artistic vision.
Bracketing:
Challenging lighting conditions, particularly high-contrast scenes, can pose a significant hurdle for photographers striving to capture a well-exposed image that retains detail in the highlights and shadows. In such situations, bracketing exposures become an invaluable technique to overcome the limitations of the camera’s dynamic range and ensure a successful outcome.
Bracketing exposures involve capturing multiple shots of the same scene at different exposure levels. Typically, this is achieved by taking three or more shots—one at the camera’s metered exposure, one underexposed (usually by decreasing the shutter speed or using a smaller aperture), and one overexposed (by increasing the shutter speed or using a larger aperture).
Once these shots are captured, photographers can merge them during post-processing using specialized software or High Dynamic Range (HDR) techniques. The blending process allows the photographer to take advantage of the properly exposed areas from each image, resulting in a final composite that reveals a more comprehensive range of tones and details.
Photographers can overcome the camera’s limitations in capturing a wide dynamic range in a single shot by using exposure bracketing in high-contrast scenes. For instance, a single exposure might lead to a blown-out sky or an underexposed foreground in a landscape with a bright sky and a darker foreground. Bracketing exposures ensure that the sky, foreground, and other critical elements are adequately exposed in at least one of the shots, giving the photographer more options during post-processing.
Additionally, bracketing exposures can be advantageous when the scene includes moving elements like water or foliage swaying in the wind. By capturing multiple shots, photographers can choose the frame with the most desirable arrangement of the moving parts or use techniques like image stacking to achieve a final image with reduced motion blur.
It’s worth noting that while bracketing exposures is an excellent tool for challenging lighting conditions, it is essential to use a tripod to maintain consistent framing across all shots. This consistency ensures that the blending process in post-processing is seamless and the final image looks natural and coherent.
As with any post-processing technique, it’s essential to blend exposures sparingly. The goal is to achieve a well-balanced image that looks natural and pleasing to the viewer’s eye. Over-processed HDR images, for example, can appear artificial and distract from the true essence of the scene.
Bracketing exposures are a powerful technique for challenging lighting conditions, particularly high-contrast scenes. By capturing multiple shots at different exposure levels and blending them, photographers can achieve a well-balanced final image with a broader dynamic range, retaining details in both highlights and shadows. When used judiciously, bracketing exposures allow photographers to overcome technical limitations and produce striking and visually captivating photographs that justify the scene’s complexity.

Patience and Timing:
Landscape photography is a pursuit that demands patience, dedication, and a deep appreciation for the beauty of the natural world. Unlike some genres of photography where the photographer can quickly capture fleeting moments, landscape photographers often find themselves waiting for that perfect moment when the elements align to create a truly remarkable and awe-inspiring image.
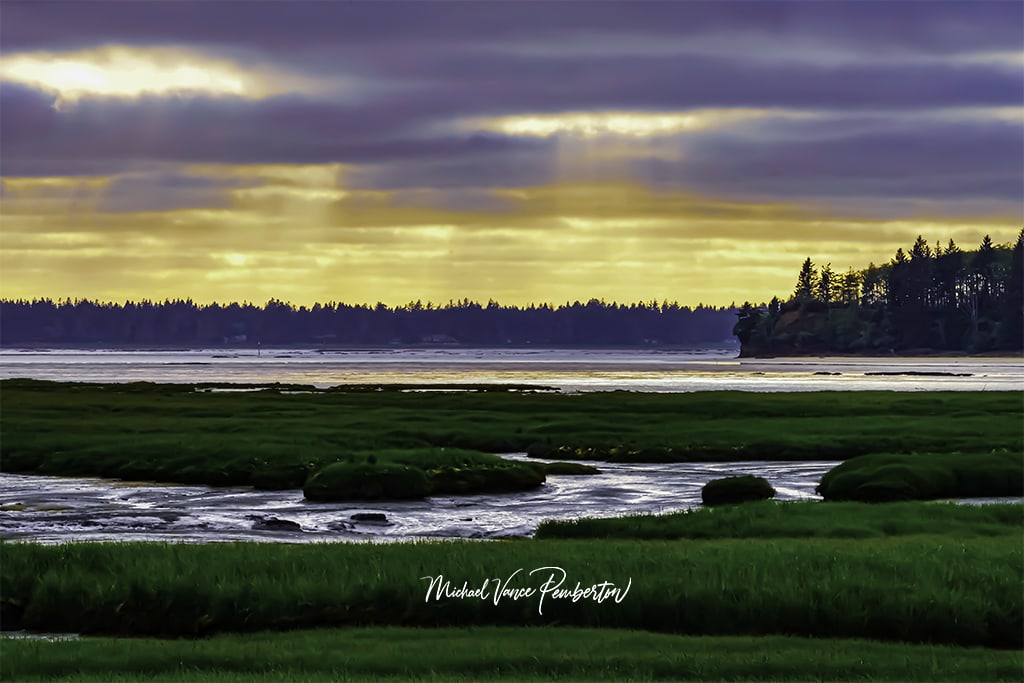
Light is one of the most critical factors in landscape photography. The quality of light can dramatically transform a scene, imbuing it with mood, depth, and texture. The soft, warm glow of the golden hour during sunrise and sunset can cast enchanting hues across the landscape. In contrast, the dramatic shadows and contrast of the blue hour, just before sunrise or after sunset, can create a captivating atmosphere. Waiting for the right light can distinguish between a mediocre shot and an extraordinary masterpiece.
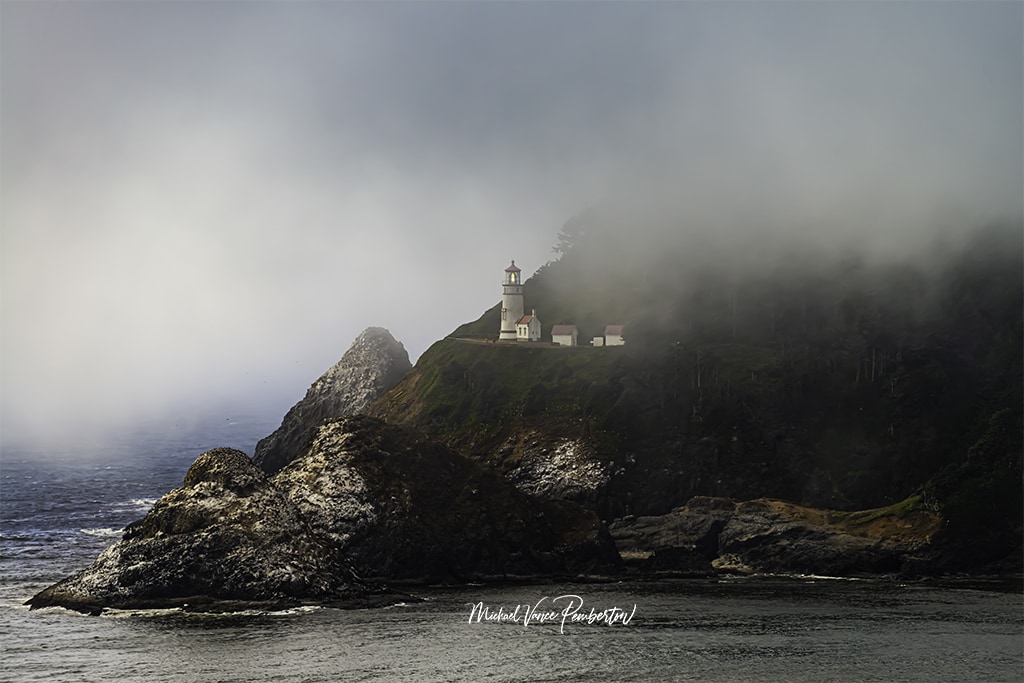
Weather conditions also play a pivotal role in landscape photography. The ever-changing elements of nature, such as clouds, fog, rain, or snow, can add drama and intensity to the scene. For instance, a landscape shrouded in mist can evoke a sense of mystery and enchantment, while stormy skies can infuse the image with power and dynamism. Photographers can capture scenes with a distinct and unforgettable character by being patient and willing to wait for the weather to cooperate.
Revisiting locations is a common practice among landscape photographers. The same landscape can look vastly different depending on the time of day, season, and weather conditions. Familiarity with a location allows photographers to anticipate how the light and weather might interact with the landscape, enhancing their ability to capture the scene in its most spectacular form. Returning to a location during different seasons also allows for capturing unique perspectives and showcasing the landscape’s diversity.
Beyond technical considerations, landscape photography encourages a deeper connection with nature. Spending time outdoors, observing the subtle changes in light and weather, fosters an appreciation for the natural world and its ever-changing beauty. This connection often shines through in the photographs, evoking an emotional response from viewers and inviting them to experience the scene more profoundly and personally.
Landscape photography is a harmonious dance between the photographer and nature, where patience, observation, and persistence lead to creating images that reflect the photographer’s vision and the magnificence of the world around them. The art of capturing landscapes in their most captivating form requires technical skill and willingness to embrace the unpredictable and immerse oneself in the wonder of the natural world.

Post-processing:
While capturing a stunning landscape photograph directly in the camera is a photographer’s primary goal, post-processing offers a creative and powerful toolset to elevate the image further. Post-processing is akin to the darkroom techniques of the film era, where photographers had the opportunity to develop and refine their prints to showcase the full potential of their artistic vision. In the digital age, editing software is the modern-day darkroom, allowing photographers to fine-tune their images and bring out the drama and beauty hidden within the raw files.
One of the fundamental aspects of post-processing is adjusting exposure. It enables photographers to optimize the brightness and tonal range of the image, ensuring that the highlights and shadows are well-balanced. Taming overly bright areas and recovering details in shadows can create a more harmonious and visually pleasing appearance.
Contrast adjustments are equally crucial in post-processing. Manipulating contrast can add depth and impact to the photograph, making the subject stand out from the background and enhancing the overall composition. Skillful differences can lead the viewer’s eye to the main focal point and create a sense of drama that draws them into the scene.
Color adjustments are another vital element in post-processing, allowing photographers to fine-tune the hues, saturation, and white balance to achieve the desired mood and atmosphere. For example, intensifying the warm tones during golden hour can heighten the sense of serenity and warmth, while enhancing cool tones can evoke a feeling of tranquility or even a hint of mystery.
Furthermore, post-processing allows for correcting any lens distortions or perspective issues that may have occurred during shooting. Cropping the image can help fine-tune the composition and remove distractions, focusing the viewer’s attention on the critical elements of the landscape.
Beyond global adjustments, selective editing tools can be employed to target specific areas of the photograph. This allows photographers to fine-tune minor details or apply creative enhancements to individual parts of the image without affecting the entire scene. It’s beneficial for emphasizing leading lines, enhancing textures, or bringing out subtle highlights in specific areas.
It’s essential to approach post-processing with an artistic mindset and to do the editing appropriately, as excessive manipulation can lead to unrealistic and unnatural-looking images. The goal is to enhance the inherent beauty of the landscape while staying true to the photographer’s vision and the scene’s essence as experienced in the field.
While the primary objective of landscape photography is to capture the best possible image in camera, post-processing serves as a powerful toolset to bring out the landscape’s full potential. Skillful use of editing software allows photographers to fine-tune exposure, contrast, color, and other elements, enhancing the image’s drama, mood, and impact. When approached with care and creativity, post-processing can elevate a good photograph into a stunning work of art that resonates with viewers and celebrates the beauty of the natural world.
Conclusion: Remember that there is no one-size-fits-all approach to landscape photography settings. The best locations depend on the scene, lighting conditions, and your creative vision. Experiment, adapt, and refine your techniques to achieve breathtaking, dramatic landscape photographs.


Recent Posts
Twenty Years in the Wild: The Patience Behind Capturing the Swallow Migration.
The Colorado River near Castle Dome glowed with first light, the water turning from ink to molten copper as the desert woke. Out of the riparian thickets rose a living wave of thousands of Tree...
Hey there, fellow shadow chaser. If you’re reading this, you’ve probably stood in golden hour light, watched a bird, a car, or a lone tree melt into a perfect black shape against a blazing sky,...